
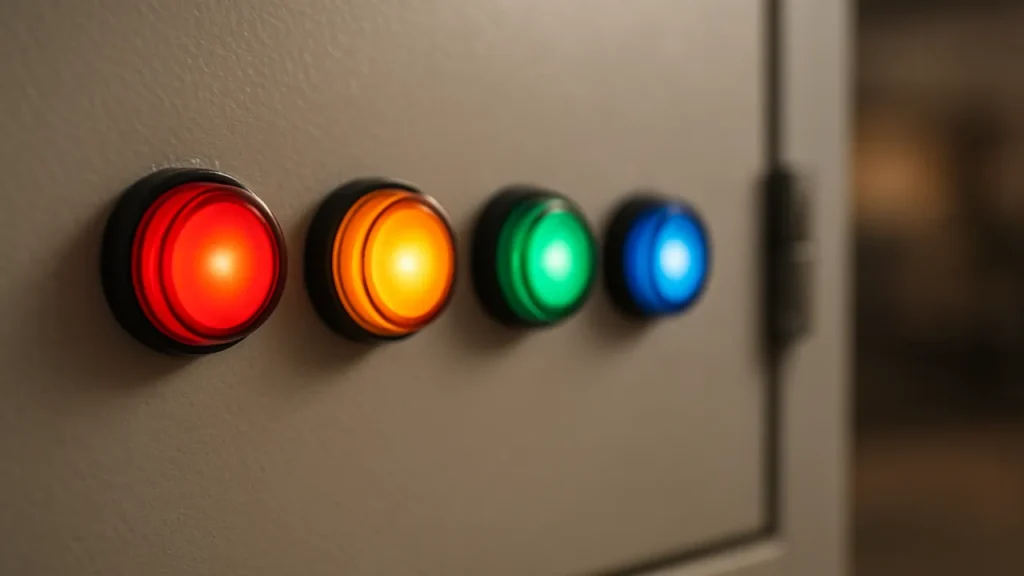
An indicating lamp is the cheapest part on a control panel and the one people argue about most. Someone wires a red lamp for “motor running”, someone else reads red as “fault”, and an operator at 2 a.m. switches off a healthy machine. This guide is about avoiding that. It covers what each lamp colour should mean, how to choose between LED and filament types, which voltage to order, and what the 22.5 mm mounting size actually means when you are standing at the counter in Hyderabad with a panel door in your hand.
If you are building the whole panel and not just the lamps, read our control panel accessories buyer’s checklist alongside this one. The lamp is one line item on that list.
What an indicating lamp (pilot light) actually does
An indicating lamp, also called a pilot light or panel indicator, tells a person the state of a circuit without opening anything. Power is on. A motor is running. A trip has occurred. A phase is missing. It carries almost no current and does no switching. Its only job is to be read correctly, quickly, from a distance, by someone who may be tired or in a hurry.
That is why the colour matters more than the brand. A lamp that is the wrong colour for its function is a safety problem, not a styling problem.
Indicating lamp colours and what they mean
The convention most Indian panel builders follow comes from the international standard for indicator colours (IEC 60073) and the machine wiring standard IEC 60204-1. The idea is simple. Each colour belongs to one kind of message.
- Red means danger or a condition that needs immediate action. Emergency stop active, overload trip, motor fault, tank overflow.
- Amber (yellow) means abnormal or a warning that needs attention soon. High temperature, low pressure, a supply that is outside tolerance, a pending maintenance alert.
- Green means normal and safe. Healthy supply, system ready, machine stopped safely and ready to start.
- Blue means the operator must do something. Reset required, mode selection needed, manual action pending.
- White is neutral. General information, supply present, or any status that does not fit the other four.
The common trap is “running”. Plants differ on whether a running motor gets a green lamp or a red one. The standard leans towards green for a safe, normal state and red for danger, but many older plants and many OEM machines use red for “motor ON” because that is what their electricians grew up with. Neither is a law in a private factory. What matters is that your panel is consistent, and that the legend plate next to each lamp says what it means in plain words. When you order, tell us the function and we will suggest the colour.
Three-phase supply indication
For incoming supply, most panels use three lamps, one per phase, in red, yellow and blue. If a lamp goes out, you know which phase has dropped before any motor starts single-phasing. Many electricians also add a phase-failure relay, but the three lamps still earn their place because they work with no logic at all. Keep the order the same on every panel you make, left to right as R, Y, B.
LED vs filament lamps: pick LED, with two exceptions
Almost every new panel should use LED indicators. They draw a fraction of the current, barely warm up, do not fail suddenly from vibration, and last for tens of thousands of hours. A filament lamp is a tiny bulb. It runs hot, it can burn out in a season on a vibrating machine, and replacing it means opening the panel door while the panel is live.
The two cases where an older style lamp still turns up:
- Replacing a lamp in an existing panel. If the holder and lens are filament-type and the plant wants a like-for-like swap, you can fit an LED retrofit lamp in many holders. Check the base type and voltage before you buy.
- Very low-cost, low-hours indication on a machine that will hardly be used. Even here the saving is small.
One more LED detail that catches people. A cheap LED lamp on a long cable run can glow faintly when it should be off, because of leakage through a neon-type circuit or a nearby live conductor. If a lamp shows a dim glow with the circuit off, the cause is usually induced voltage, not a faulty lamp. A quality LED module with a proper internal driver is much less prone to this.
Choosing the voltage
The lamp voltage must match the circuit it is wired across. This is the single most common ordering error, and it is the reason we always ask you to write the voltage in the remarks when you enquire.
- 230 V AC is the usual choice for lamps wired phase to neutral on a general panel. Most indicator lamps sold in India are this voltage by default.
- 24 V AC/DC is the standard for control-circuit indication in machine panels, PLC outputs and anything fed from a control transformer or SMPS.
- 110 V and 12 V versions exist for specific machines and vehicles.
- 415 V across two phases is possible on some ranges, but it is not common. Most builders take a 230 V lamp from phase to neutral, or use a 24 V lamp from a transformer, because it is simpler and safer.
Never connect a 24 V lamp to 230 V. It will fail at once, and it can fail loudly. Never put a 230 V lamp on a 24 V supply and expect it to be bright. It will be dim to the point of looking dead. If you are not sure, write the circuit voltage and whether it is AC or DC. We would rather ask twice than ship the wrong item.
The 22.5 mm mounting hole, explained
Most industrial pilot lights are described as 22 mm or 22.5 mm. These are the same thing. The number is the panel cut-out diameter. A standard round hole of about 22.5 mm lets the same hole take a pilot light, a push button, a selector switch or an emergency stop, because the whole family follows the same mounting size. That is why panel builders like it: one drill bit, one punch, any device.
Other sizes exist, mainly 16 mm for compact panels and 30 mm for larger devices, but 22.5 mm is the default in Indian industry. A few practical points:
- The panel plate thickness matters. The lamp has a fixing nut that works across a range of thickness. Very thick plate or very thin plate can need a different fixing.
- Check the depth behind the door. The body and the terminals need clearance, especially in shallow enclosures.
- Look at the front protection rating if the panel is outdoors, near water or in a dusty shop floor. Many pilot lights are rated up to IP65 at the front when the gasket is fitted correctly. A rating on the data sheet is not the same as a rating in your panel if the hole is rough or oversize.
“With buzzer” and “without buzzer”
You will see both listed. A steady indicating lamp simply stays on. A lamp with a built-in buzzer adds an audible alarm for fault conditions, which is useful in a noisy plant where nobody is looking at the panel. For most distribution boards and motor starter panels you want the plain lamp without a buzzer. Use the buzzer type for genuine alarm points, and keep them to a few, or operators learn to ignore the sound. If a lamp can also flash, that is a separate type again, so say whether you need steady or flashing.
Standards and quality: what to ask for
Indicating lamps used as control-circuit devices fall under IEC 60947-5-1 (IS/IEC 60947-5-1 in India), which covers control circuit devices and switching elements. For a lamp itself the points that matter in practice are more basic:
- The rated voltage and whether it is AC, DC or both.
- The colour of the lens, not just the colour of the LED, because a white LED behind a coloured lens is common and fine, while a weak coloured LED behind a clear lens is not.
- A terminal design that takes the wire size you use. Screw terminals suit most electricians. Spring terminals are faster on repeat builds.
- A known manufacturer. Unbranded lamps are cheap, but a batch where the red and amber look the same at a glance can ruin a whole panel.
We supply panel accessories from established makers alongside our switchgear. You can see the range on our panel accessories page, and the PTI range is worth a look if you also need busbar insulation sleeves from the same supplier.
Common mistakes to avoid
- Ordering without the voltage. Colour alone is not an order. State the voltage in the remarks every time.
- Using red for everything. If every lamp is red, nobody reads the panel. Reserve red for real danger.
- No legend plates. A lamp with no label depends on memory. A cheap engraved label saves hours.
- Mixing lamp families in one panel. Different brands with slightly different lens depths make a panel door look untidy and are harder to service.
- Wiring a lamp across a coil without thinking. A lamp in parallel with a contactor coil is normal. A lamp in series with something is rare and usually a mistake.
- Forgetting spares. Panels get serviced years later. Keep a few spare lamps of each colour and voltage in the maintenance store.
- Skipping the lamp test button. Larger panels should have a lamp test push button so a dark lamp is known to be healthy or dead, not “off”.
How to choose: a quick walk-through
Take a typical motor starter panel. You want a lamp for supply on, one for motor running, and one for overload trip. Supply on is white or three R-Y-B lamps if the panel is the incoming one. Motor running is green or red according to your plant’s habit, but be consistent. Overload trip is red or amber, and many builders pick amber for a thermal overload that can be reset and red for a hard fault. All three are 22.5 mm, all three at the control voltage you chose, and all three labelled. That is the whole job.
If the panel includes contactors and overload relays, you can pair the lamps with the starter parts from our ABB switchgear range, so one enquiry covers the whole starter.
Buying indicating lamps in Hyderabad
If you are a panel builder in Hyderabad, Secunderabad or elsewhere in Telangana and Andhra Pradesh, the practical advice is to buy lamps, push buttons and selectors in one go, from one maker, in a single enquiry. That keeps the lens depth and mounting nut identical and avoids a second trip when one item turns out to be the wrong voltage. We are based in Rasoolpura and supply across both states. Send us the quantity, colours, voltage and whether you want LED, and ask for a price list from the enquiry page. For anything bulk or for a repeat order, tell us the panel quantity and we will quote against that.
Prices change with brand, colour, voltage and quantity, so we do not publish a single number here. Send the details and you get a quote.
Wiring and troubleshooting: why a lamp glows when it should be off
This is the call every supplier gets. “The lamp is dim even with the switch off.” In nearly every case the lamp is fine and the wiring is the cause.
- Induced voltage on long control cables. A cable running beside a live power cable can pick up enough voltage to light a sensitive LED faintly. Separate control and power cables, or use a lamp with a higher turn-on threshold.
- Leakage through a switching device. A solid-state output or a proximity sensor can leak a little current even when “off”. The lamp across it glows. A small resistor in parallel, or a lamp made for that duty, fixes it.
- A floating neutral. If the lamp’s neutral side is not solidly connected, the lamp can sit at a stray voltage. Check the neutral first, because it is free.
- The wrong voltage. A 110 V lamp on 230 V will be very bright and then dead. A 230 V lamp on 110 V will look half-lit.
Flickering is another common call. A lamp that flickers when a contactor operates is often sharing a supply with a coil that causes a voltage dip. Feed the lamps from a stable control supply, and keep the lamp circuit fused separately from the coil circuit so one fault does not black out every indicator.
Fusing and protecting the lamp circuit
An indicator lamp is a tiny load, but its wire still needs protection. Put a small control fuse or a single-pole MCB on the lamp supply. If a lamp holder shorts, the fuse trips and the main circuit stays alive. This matters most on panels where the lamps are fed from the same phase as a large load. Your lamp supply should never be the weakest link that takes the whole starter down.
A simple ordering checklist
When you send an enquiry for indicating lamps, give us these seven things and the quote comes back without a single follow-up call:
- Quantity of each colour.
- Voltage and whether it is AC, DC or AC/DC.
- LED or filament (LED unless you say otherwise).
- Steady, flashing, or with buzzer.
- Mounting size, 22.5 mm unless the panel is compact.
- Any brand you already use in the panel, so the new lamps match.
- Delivery location, so we can tell you how soon it reaches you.
Summary
Pick the colour by meaning, not by habit. Choose LED unless you have a reason not to. Match the voltage to the circuit and write it on your order. Use the 22.5 mm cut-out so you can swap in other control devices later. Label every lamp. Do those five things and your panel will be readable by someone who has never seen it before, which is the real test of a good panel.
Frequently asked questions
What do the different indicating lamp colours mean?
Red is for danger or a fault, amber for a warning or abnormal condition, green for normal or safe, blue for an action the operator must take, and white for neutral information. Whatever scheme you use, keep it the same across every panel and label each lamp.
What is the difference between an indicating lamp and a pilot light?
Nothing in practice. Indicating lamp, pilot light, panel indicator and signal lamp all describe the same device, a small light on a panel that shows the state of a circuit.
Is 22 mm the same as 22.5 mm for pilot lights?
Yes. Both refer to the panel cut-out diameter. The same hole takes pilot lights, push buttons, selector switches and emergency stops from the same family.
Should I buy LED or filament indicating lamps?
LED for almost every new panel. LEDs draw very little current, stay cool, resist vibration and last far longer. Use filament types only where you must match an old holder, and even then check whether an LED retrofit fits.
Why does my indicating lamp glow dimly when the circuit is off?
This is usually induced or leakage voltage on the control wiring, not a faulty lamp. Separate control cables from power cables, check the neutral connection, or use a lamp made for that duty.
What voltage indicating lamp do I need?
Match the circuit it is wired across. 230 V AC is common on general panels and 24 V AC/DC on machine and PLC control circuits. Always state the voltage when you order.
